Configure pay cycles
A pay cycle in Paysense controls how often pay runs occur for a group of employees - weekly, fortnightly, or monthly. Every employee belongs to exactly one pay cycle, which decides:
- The length of each pay period (7 days, 14 days, or one calendar month)
- How many pay runs the employee receives per year (52, 26, or 12)
- Which pay run the employee shows up in when you start a new run
This tutorial shows you the three default pay cycles that are seeded automatically when you create a new business, then walks through creating a custom pay cycle for a specific group of employees (for example, casuals on a different fortnight to your salaried staff).
What you'll need
| Item | Required | Notes |
|---|---|---|
| A business in Paysense | Yes | Created via the Add a business tutorial |
| A name for your custom cycle | Optional | Only needed if you're creating a custom cycle |
| Which frequency it should run on | Optional | Weekly, Fortnightly, or Monthly |
You don't have to create any custom pay cycles to start running payroll - the three defaults (Weekly, Fortnightly, Monthly) cover most Australian businesses out of the box. Custom cycles are useful when you need to separate groups of employees that share a frequency but should be paid in different runs (for example, casuals paid on the opposite fortnight to salaried staff).
Step 1: Open the Pay Cycles screen
From the left-hand sidebar, expand your business and click Pay cycles. You'll land on the Pay Cycles screen at /business/{businessId}/paycycles.
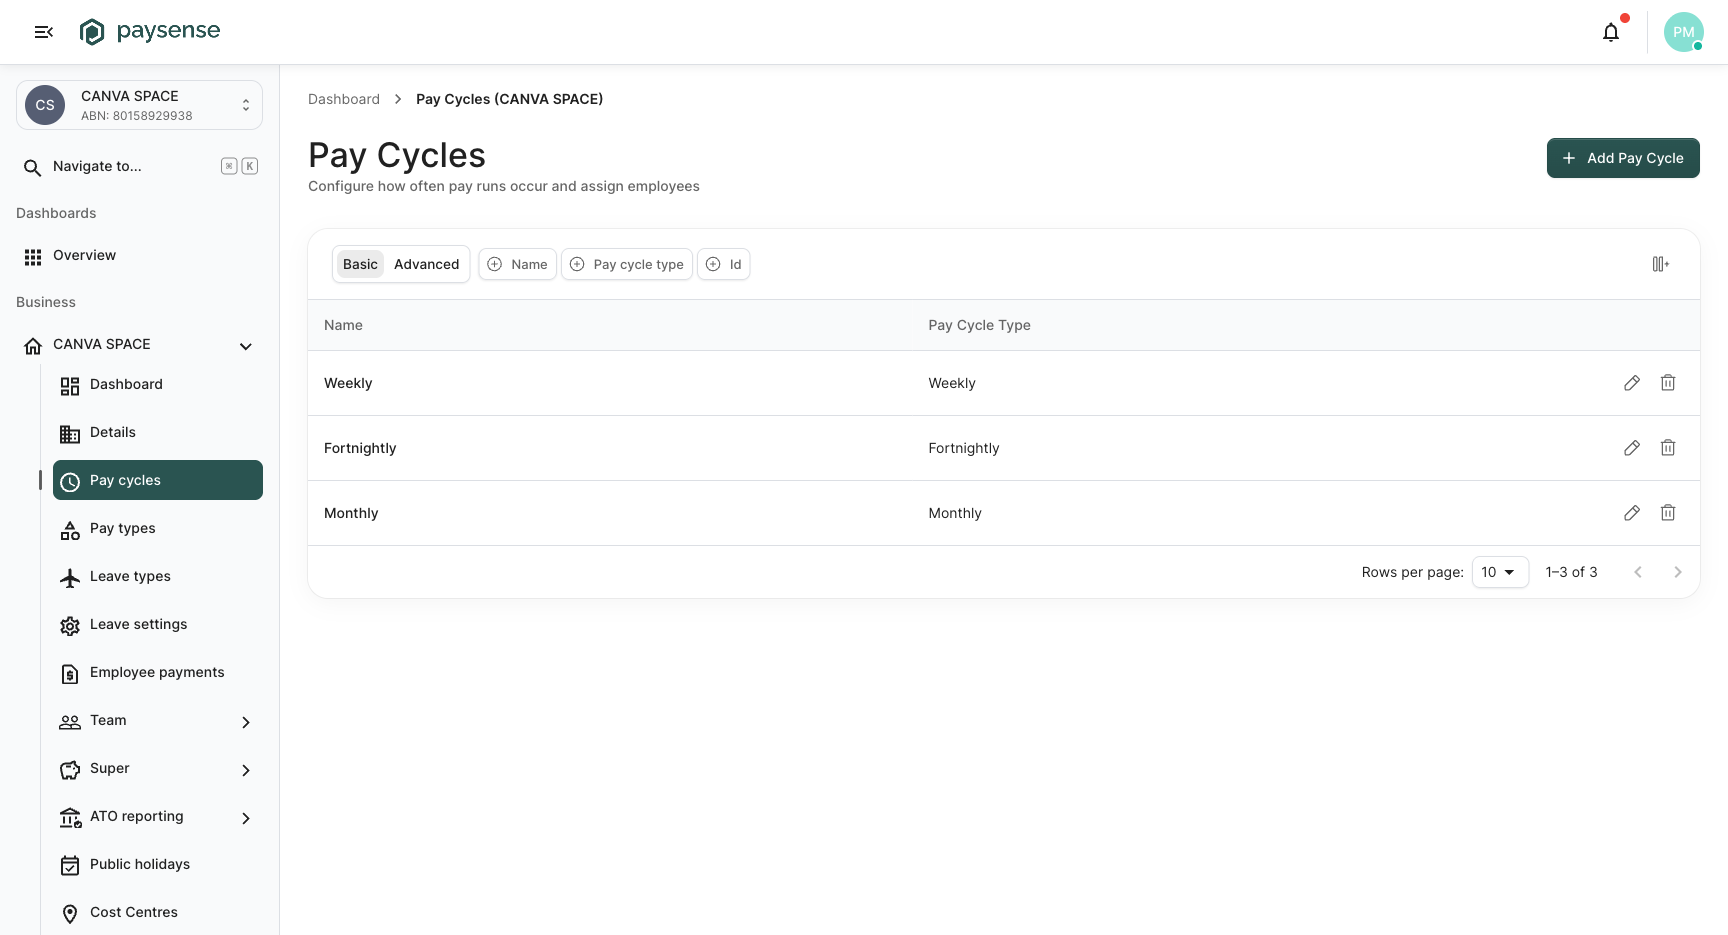
Every brand-new business is automatically seeded with three default pay cycles:
| Name | Frequency | Periods per year | Period length |
|---|---|---|---|
| Weekly | Weekly | 52 | 7 days |
| Fortnightly | Fortnightly | 26 | 14 days |
| Monthly | Monthly | 12 | 1 calendar month |
You'll see them listed in the grid with Edit and Delete actions on each row. The header summarises what this screen does: "Configure how often pay runs occur and assign employees."
You can rename, edit, or delete the default cycles at any time - they're not protected. The only time you can't delete a cycle is if it has employees attached to it; in that case you'll need to move those employees to a different cycle first.
Step 2: Decide whether you need custom cycles
Before adding anything custom, ask yourself:
- Does my business pay everyone on the same cadence? If yes, the defaults are enough - assign every employee to Weekly, Fortnightly, or Monthly and skip the rest of this tutorial.
- Do I need to split employees into separate runs even though they share a frequency? If yes, create a custom cycle. Common reasons:
- Casuals on alternating fortnights - casual staff paid in week 1 and 3, salaried staff paid in week 2 and 4
- Different business units - head office paid monthly, retail floor paid fortnightly, with separate "Head Office Monthly" and "Retail Fortnightly" cycles to keep payroll reports clean
- Shadow runs - a parallel cycle used for testing payroll changes before flipping employees over
For this tutorial we'll create a Casuals - Fortnightly cycle to demonstrate the workflow.
Step 3: Open the Add Pay Cycle modal and pick a frequency
Click the Add Pay Cycle button in the top-right of the Pay Cycles screen. A modal opens with just two fields - Name (a free-text label that appears in dropdowns and reports) and Type (the frequency, defaulting to Weekly).
Click the Type dropdown to see the available frequencies.
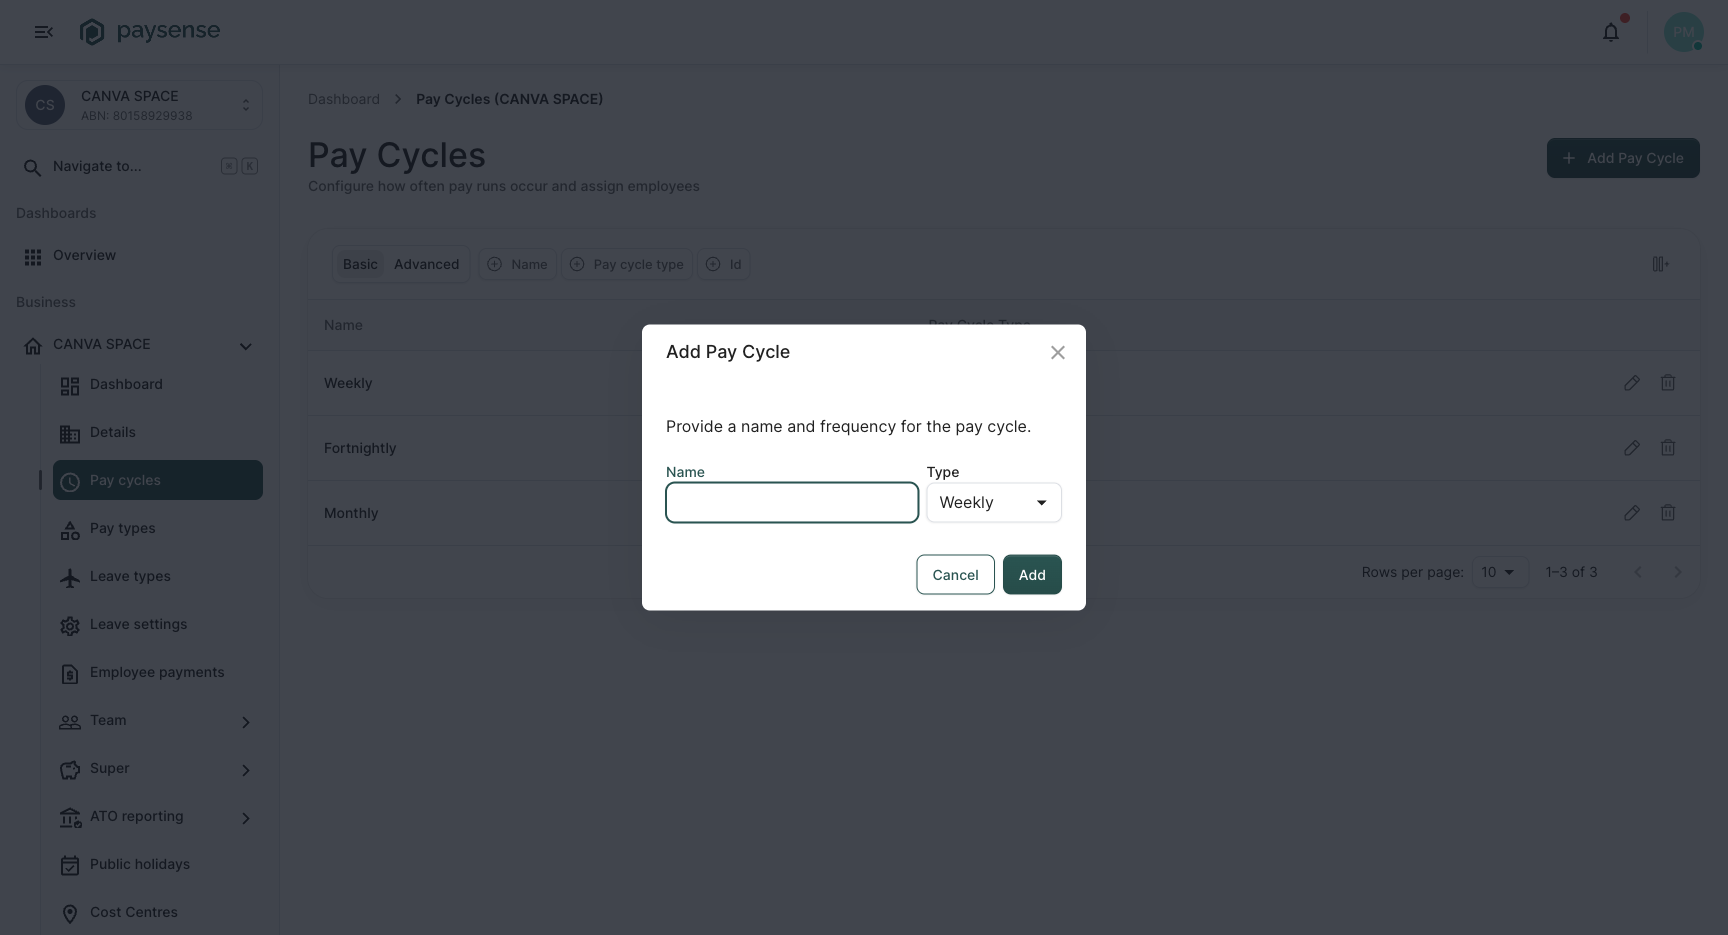
Paysense supports three frequencies:
| Type | When you'd use it | Pay periods per year |
|---|---|---|
| Weekly | Hourly staff, casuals on a weekly roster | 52 |
| Fortnightly | The most common AU cadence - salaried and award-paid staff | 26 |
| Monthly | Senior staff, executives, or businesses with monthly payroll | 12 |
For our example, select Fortnightly.
The frequency you pick here is permanent for this cycle. If you later realise you need a different cadence, create a new cycle with the right frequency and move employees over - don't try to "convert" an existing cycle, because the period boundaries won't line up cleanly.
Now type a descriptive name in the Name field. Good names tell a payroll officer who the cycle is for, not just how often it runs.
| Bad name | Better name |
|---|---|
Fortnightly 2 | Casuals - Fortnightly |
New cycle | Retail Floor - Weekly |
Test | Head Office - Monthly |
For our example, type Casuals - Fortnightly.
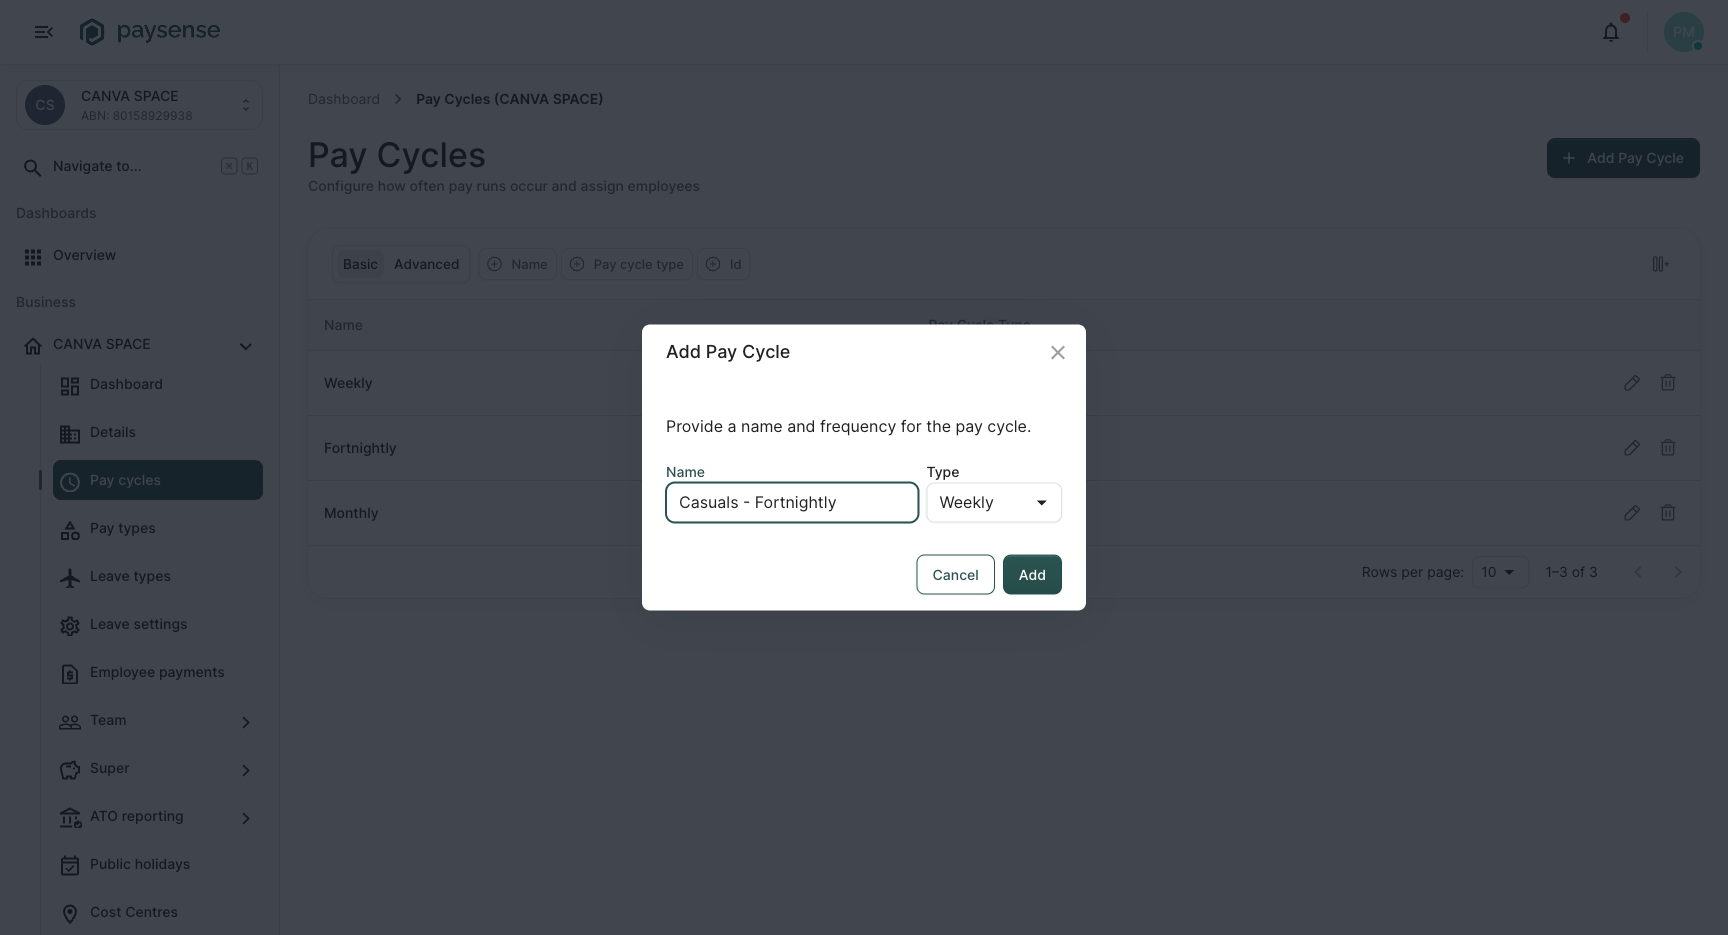
Click Add to save the cycle.
Step 4: Attach the cycle to employees
Pay cycles are attached to employees one at a time, on the Employment Details step of the Add Employee wizard. When you add a new employee at /business/{businessId}/employees/add/personal-details, the wizard's second step (Employment Details) presents a Pay cycle dropdown listing every cycle on the business - including any custom ones you created in this tutorial.
A few rules to keep in mind:
- The Pay cycle field on the employee form is required - there's no default and no auto-fill, so the payroll officer adding the employee picks a cycle deliberately.
- An employee belongs to exactly one pay cycle at a time.
- You can change an employee's pay cycle later from their employment details, but doing so mid-pay-period can affect their next pay run - make the switch at the start of a fresh period where possible.
Paysense doesn't have a per-business default pay cycle. The order of rows on the Pay Cycles screen has no effect on what new employees inherit - the cycle is always picked explicitly when the employee is added.
For the full Add Employee walkthrough, see the Add an employee tutorial.
Editing or deleting an existing cycle
From the Pay Cycles list:
- Edit - click the pencil icon on a row to reopen the same modal pre-populated with the cycle's current values. Change the name and/or frequency, then click Update.
- Delete - click the trash icon. Paysense will ask you to confirm. Deletion is blocked if the cycle has employees attached, with a message telling you how many employees you need to move first.
Renaming a cycle is safe and instant - no historical data is affected because pay runs reference the cycle by ID, not by name. Changing the frequency, however, only takes effect from the next pay run; pay runs that have already been processed against the cycle keep their original period boundaries.
What's next
Now that you understand pay cycles, the next steps are:
- Add your first employee - the wizard will ask you to pick the pay cycle they belong to. See Add an employee.
- Run your first pay run - Paysense generates one pay run per cycle per period, automatically picking up every active employee in that cycle. See Run your first pay run.
- Reconfigure cycles as you grow - come back to this screen any time you need to add, rename, or retire a cycle.
Troubleshooting
| Symptom | Likely cause | What to do |
|---|---|---|
| Add Pay Cycle button doesn't open the modal | A blocking dialog or notification is open elsewhere on the page | Dismiss any open dialogs and try again |
| Custom cycle doesn't appear in the dropdown when adding an employee | The employee form was opened in another tab before the cycle was created | Refresh the Add Employee page so the dropdown re-fetches the list |
| Delete button is disabled or shows an error | The cycle has employees attached | Move those employees to a different cycle first, then retry the delete |
| Cycle name shows the wrong text after editing | Browser cached the old grid | Refresh the Pay Cycles page |
| Two cycles with the same name appear | Paysense allows duplicate names by design | Rename one of them so payroll officers can tell them apart in dropdowns |
If you hit a problem the table doesn't cover, check the Notifications panel on the business dashboard - Paysense logs every pay-cycle change there.