Set up superannuation
Before you can process superannuation contributions through Paysense, you need to configure two things for your business: a default super fund and a connection to Beam, the clearing house that distributes super payments to employee funds.
This guide walks through both steps end-to-end. Once complete, your business will be ready to submit super contributions as part of each pay run.
What you'll need
| Item | Required | Notes |
|---|---|---|
| A business already created in Paysense | Yes | See Add a business if you haven't done this yet |
| Your default super fund name or USI | Yes | The APRA-authorised fund you'll use for employees who don't nominate their own |
| A nominated contact person | Yes | Name, email, and phone number for Beam registration |
You can complete these steps at any time after creating the business, but it's best to do it before your first pay run so that super contributions are ready to go.
Step 1: Configure the default super fund
From the left-hand sidebar, expand the business name and click Super → Default Fund. You'll land on the Super setup page at the Default Fund tab.
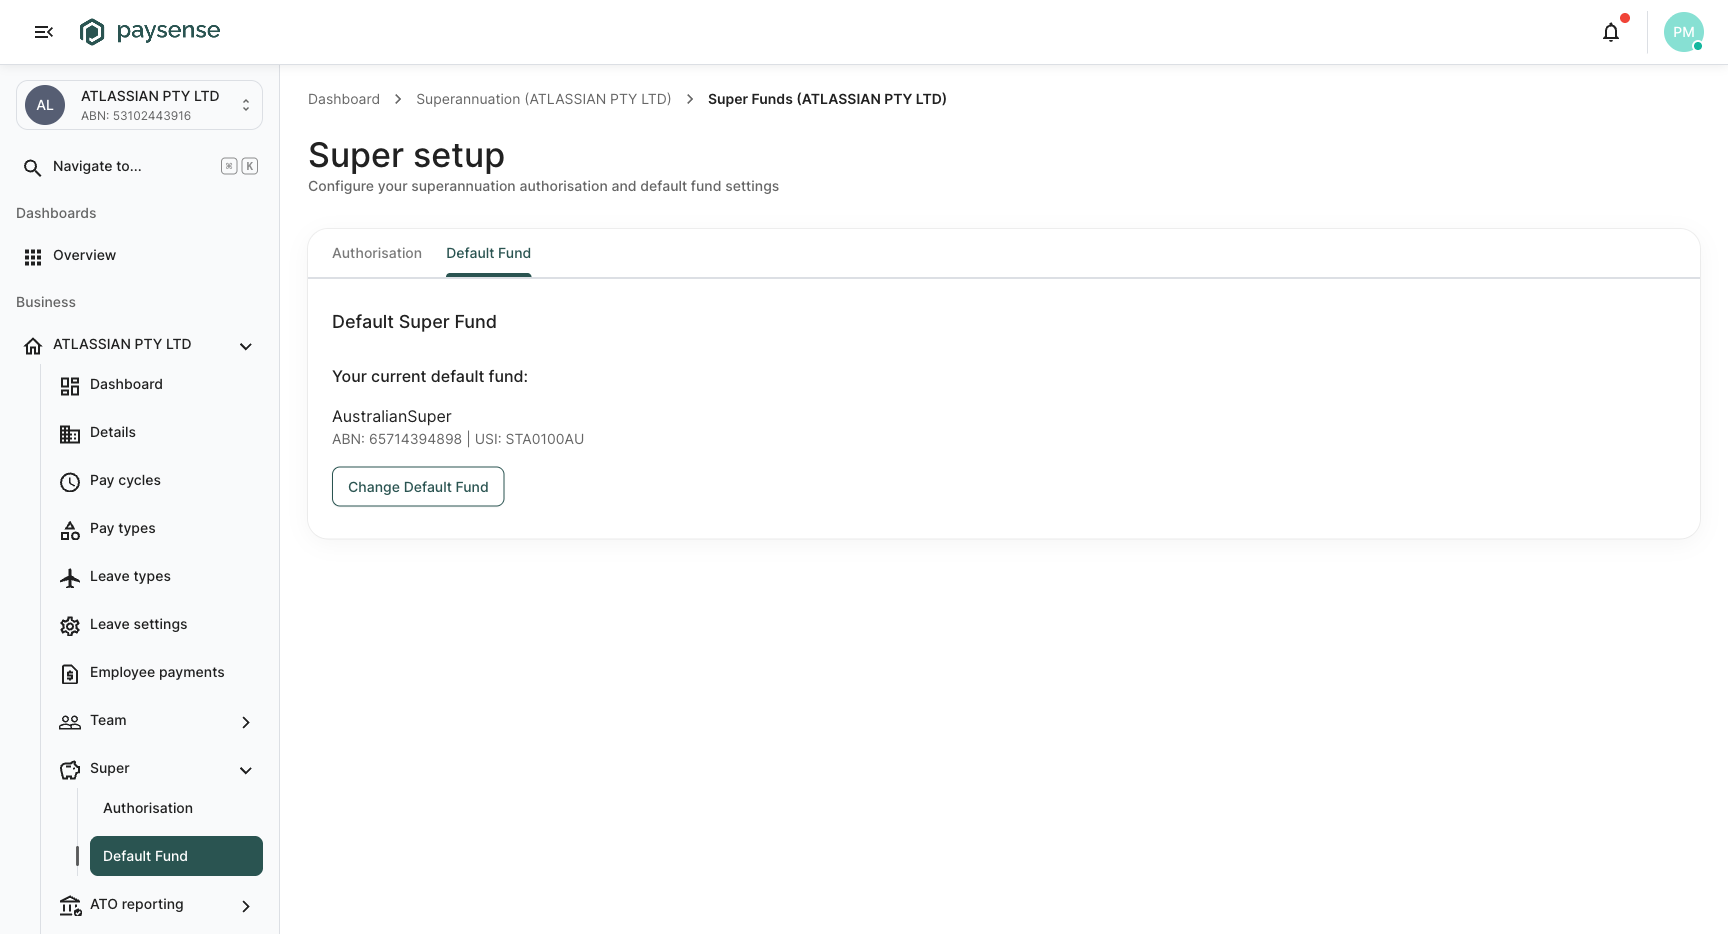
The page displays the business's current default super fund, including the fund name, ABN, and USI (Unique Superannuation Identifier). If you need to change it, click Change Default Fund and search for the new fund by name or USI.
The default super fund is the fund that Paysense sends to Beam for any employee who hasn't nominated their own fund via a Standard Choice Form. Under Australian superannuation law, employers must offer a default fund that is APRA-authorised and offers a MySuper product.
Step 2: Authorise with Beam
Switch to the Authorisation tab on the same page: or navigate directly via the sidebar under Super → Authorisation.
This page shows the current registration status with Beam. If the business has not yet been registered, the status will display Not Registered.
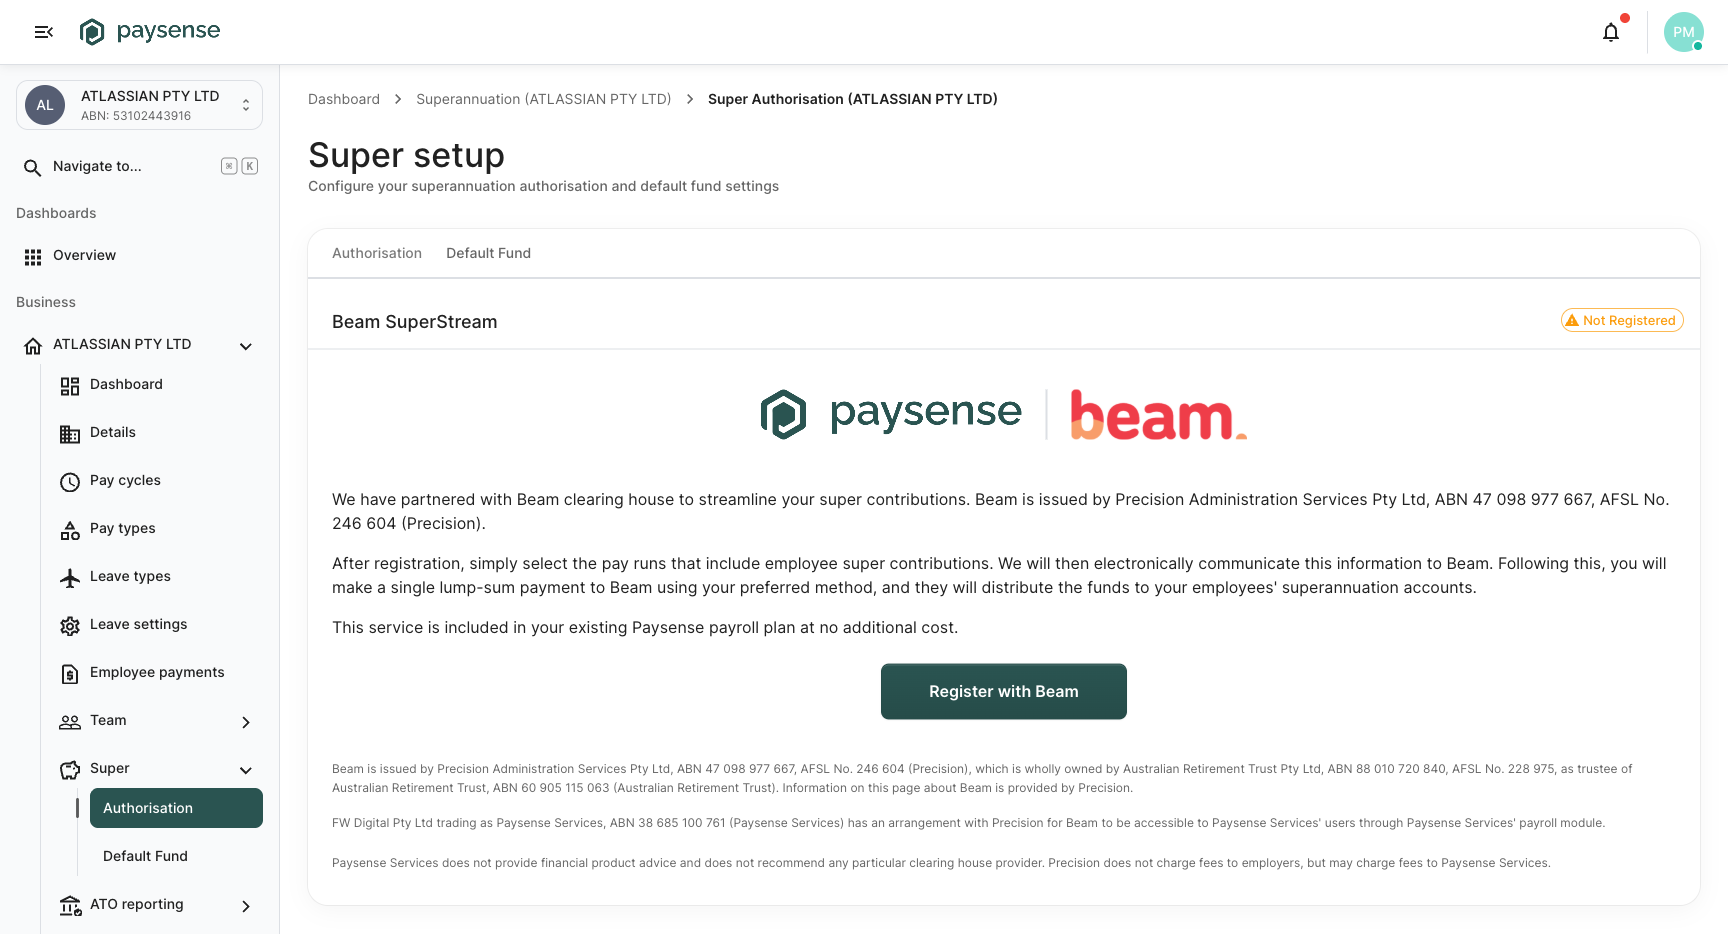
Paysense has partnered with Beam clearing house to streamline super contributions. Beam is included in your Paysense payroll plan at no additional cost. After registration, Paysense will electronically send contribution data to Beam, and you make a single lump-sum payment: Beam then distributes the funds to each employee's super fund.
Click Register with Beam to begin the registration process. A confirmation dialog will appear summarising what happens next.
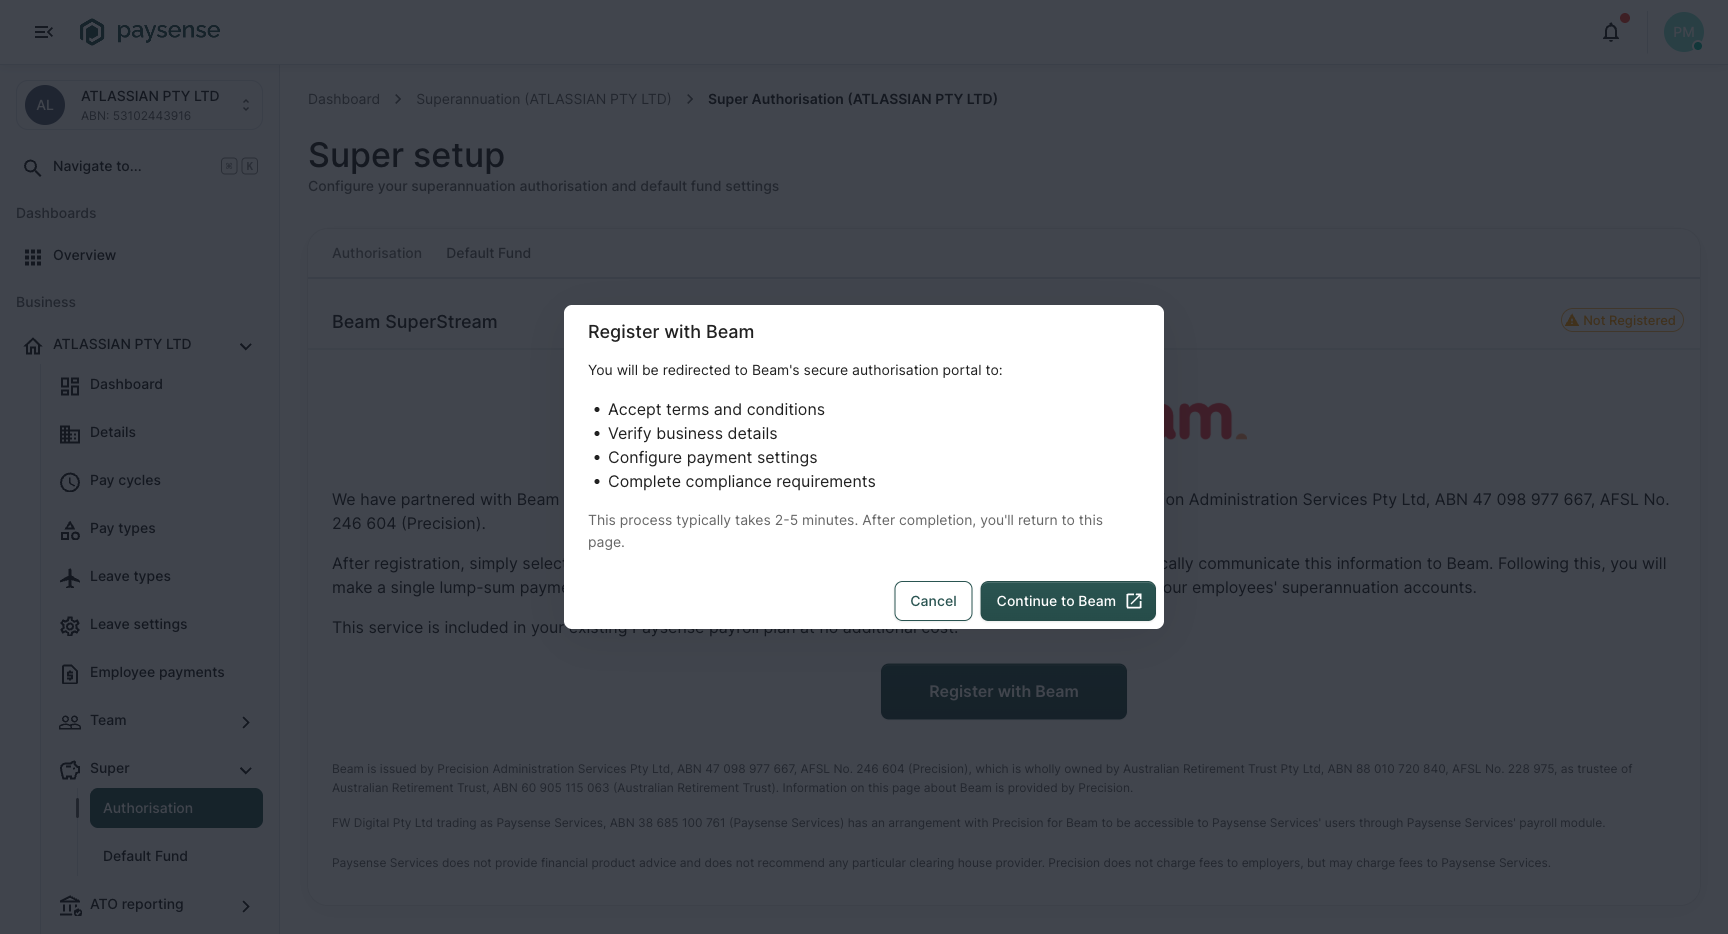
Click Continue to Beam: this opens the Beam registration portal in a new browser tab.
Step 3: Complete the Beam registration
The Beam portal walks you through four steps. Your business details are pre-filled from Paysense, so most fields are already populated.
Welcome
The landing page outlines the four registration steps: your details, payment method, default fund, and terms and conditions.
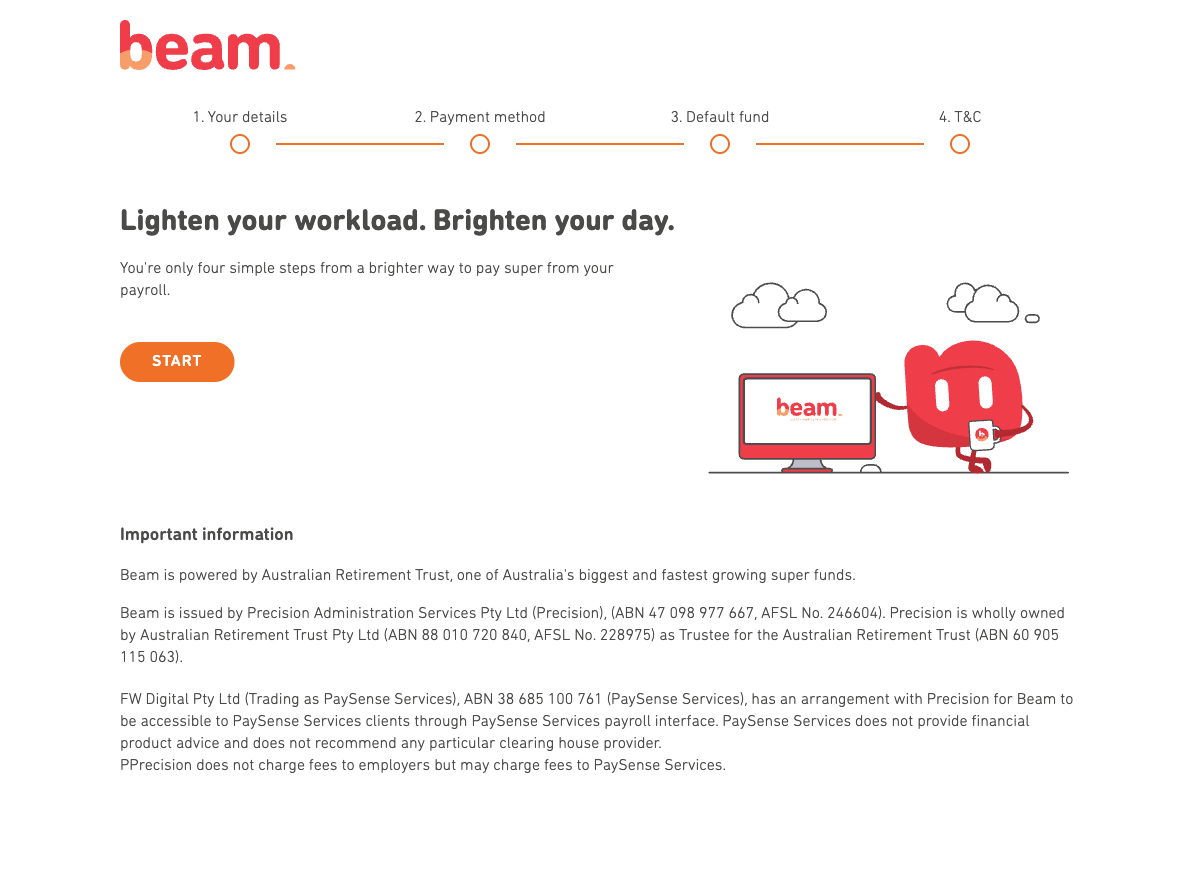
Click Start to begin.
3a: Your details
Beam displays your business details (ABN, business name), registered address, and contact information: all pre-filled from your Paysense business record. Review the details and correct anything that is out of date.
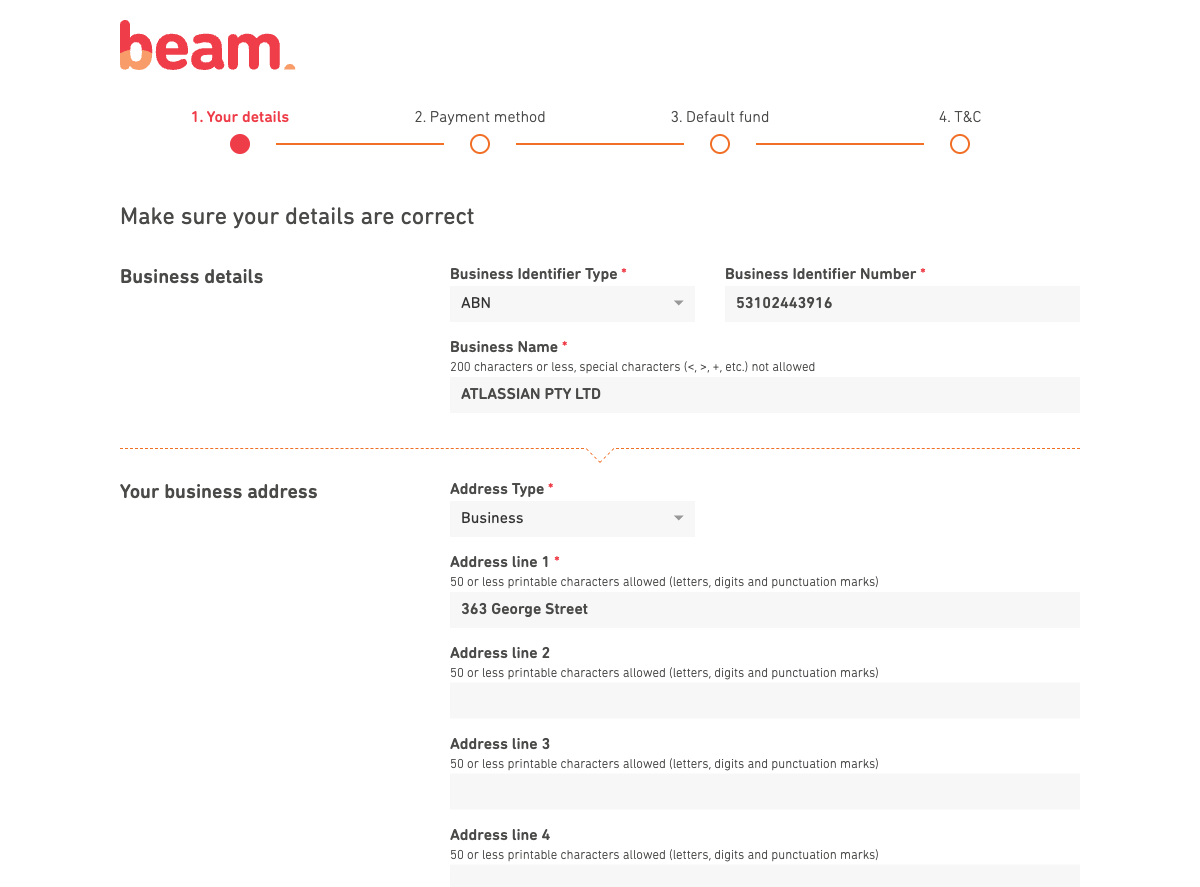
Click Next when the details are correct.
3b: Payment method
Choose how you intend to pay your super contributions to Beam. The available methods are Direct Debit, EFT, and BPAY. You don't need to provide bank details at this stage: payment instructions are provided each time you submit a contribution batch.
If you intend to use direct debit, select Yes and provide your bank account details. Otherwise, leave the default selection as No.
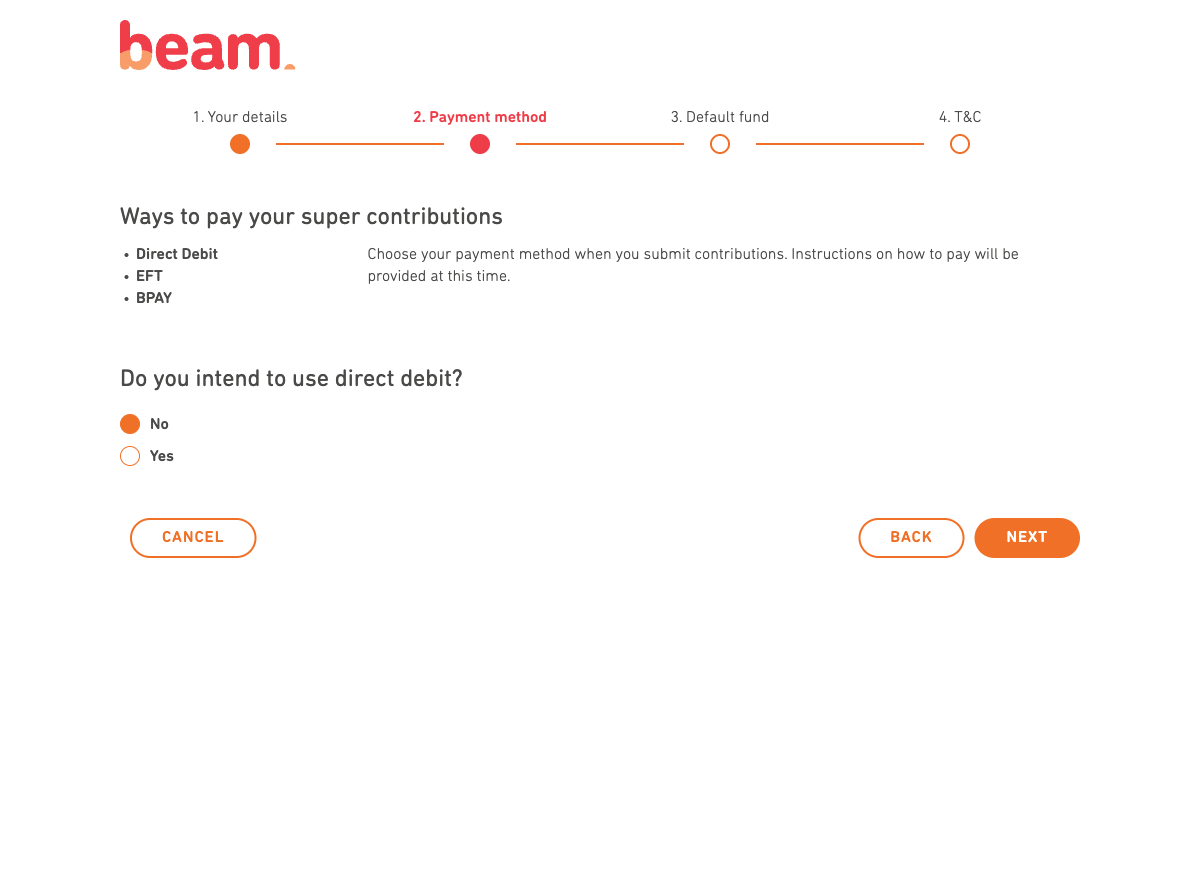
Click Next to continue.
3c: Default fund
Beam shows the default super fund that was passed through from Paysense. You can add additional default funds here if your business uses more than one.
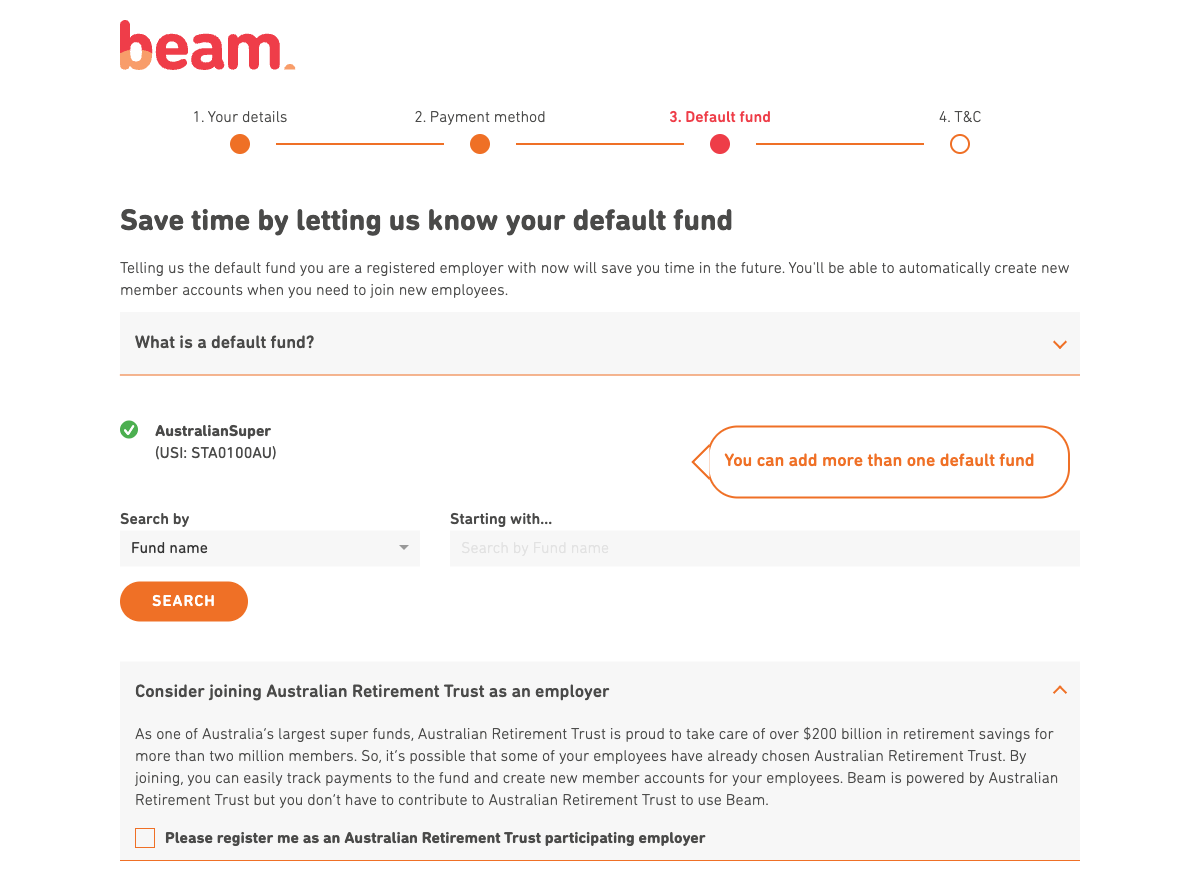
If you set up your default fund in Paysense first (Step 1), it will appear here automatically. This saves you from having to search for it again in the Beam portal.
Click Next to proceed to the final step.
3d: Terms and conditions
Read and accept the Beam terms and conditions and the Precision Privacy Policy. Tick the checkbox to confirm, then click Next to complete the registration.
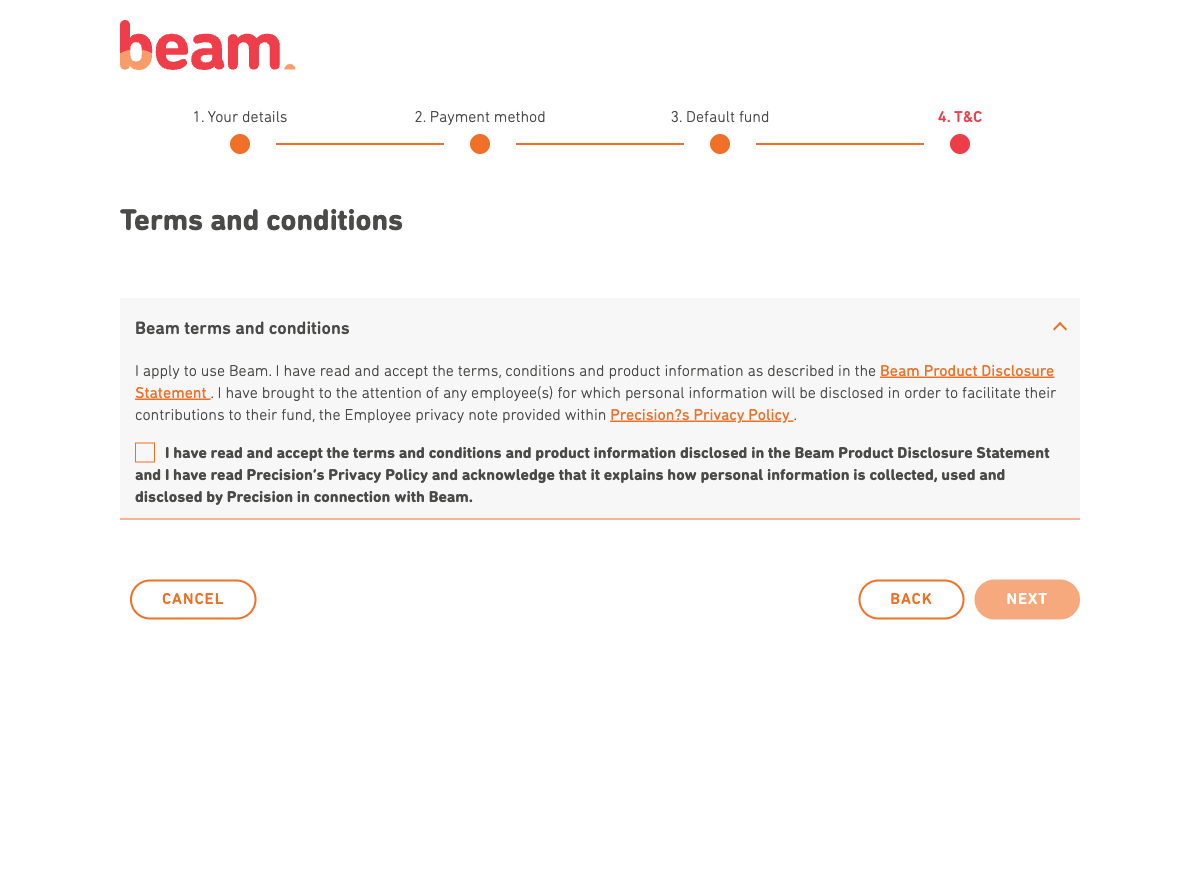
Once submitted, the Beam tab will confirm that registration is complete. You can close the Beam tab and return to Paysense: the Authorisation page will now show a Registered status.
What's next
- Add an employee: when you reach the super fund step in the employee wizard, the default fund you configured here will be offered automatically
- Lodge a super contribution: create a contribution batch when you finalise a pay run, validate it with Beam, and submit it. Paysense sends the data to Beam and provides you with payment instructions
- Pay day super: with Beam connected, your business is ready to meet pay day super obligations by submitting contributions alongside each pay run