Import employees
Importing employees lets you add or update many staff in one step by uploading a file, instead of running the Add Employee wizard once per person. The file uses the same column layout as the employee export, so the quickest way to get a correctly-shaped file is to export your existing employees first and edit that.
This tutorial walks through the import dialog end-to-end for the FW DIGITAL PTY LTD business, uploading a file of six employees. By the end you'll have started a background import and know how to read its result on the employees list.
What you'll need
| Item | Required | Notes |
|---|---|---|
| A business in Paysense | Yes | Created via the Add a business tutorial |
An Excel (.xlsx) or CSV file | Yes | Must match the employee export schema. Export your current employees first to get the exact columns - see Step 1. |
The Employee.Write permission | Yes | The same permission the Add Employee wizard needs. Without it the Import button and the import screen are not available to you. |
You don't need to fill in every column. Start from an export, keep the header row, and edit or add the rows you need - the import reads each row against the same rules the wizard applies.
Step 1: Prepare your import file
The import accepts an Excel (.xlsx) or CSV file whose header row matches the employee export. The simplest way to get that header row is to export first: on the employees list, click Export, then choose Excel (.xlsx) or CSV under All employees (or Blank template for an empty file with just the headers). Open the downloaded file and add or edit rows.
Four columns must be present in the header or the whole file is rejected before any row is read: FirstName, Surname, Email, and StartDate. Each row is then checked against these rules in the browser:
| Column | Required | Notes |
|---|---|---|
FirstName, Surname | Yes | The employee's legal name. |
Email | Yes | Must be a valid email address. |
StartDate, DateOfBirth | Yes | Use the yyyy-MM-dd format, e.g. 2026-06-12. |
Residential_AddressLine1, Residential_Suburb, Residential_State, Residential_Postcode | Yes | The employee's residential address. |
TerminationType | Conditional | Required only when the row has an EndDate. |
This is a first pass in the browser to catch obvious problems early. The server runs the full validation when the import job runs - including the tax file number, pay cycle, pay rate, and bank details each employee needs - so a row that passes here can still be rejected by the server.
Step 2: Open the import dialog
From the left-hand sidebar of your business, click Employees to land on the employees list at /business/{businessId}/employees. In the top-right, next to Export and Add, click Import.
| Field | Required | Notes |
|---|---|---|
| File | Yes | Chosen with the Choose file button. Accepts one Excel (.xlsx) or CSV file matching the export schema. Nothing can be imported until a file is loaded. |
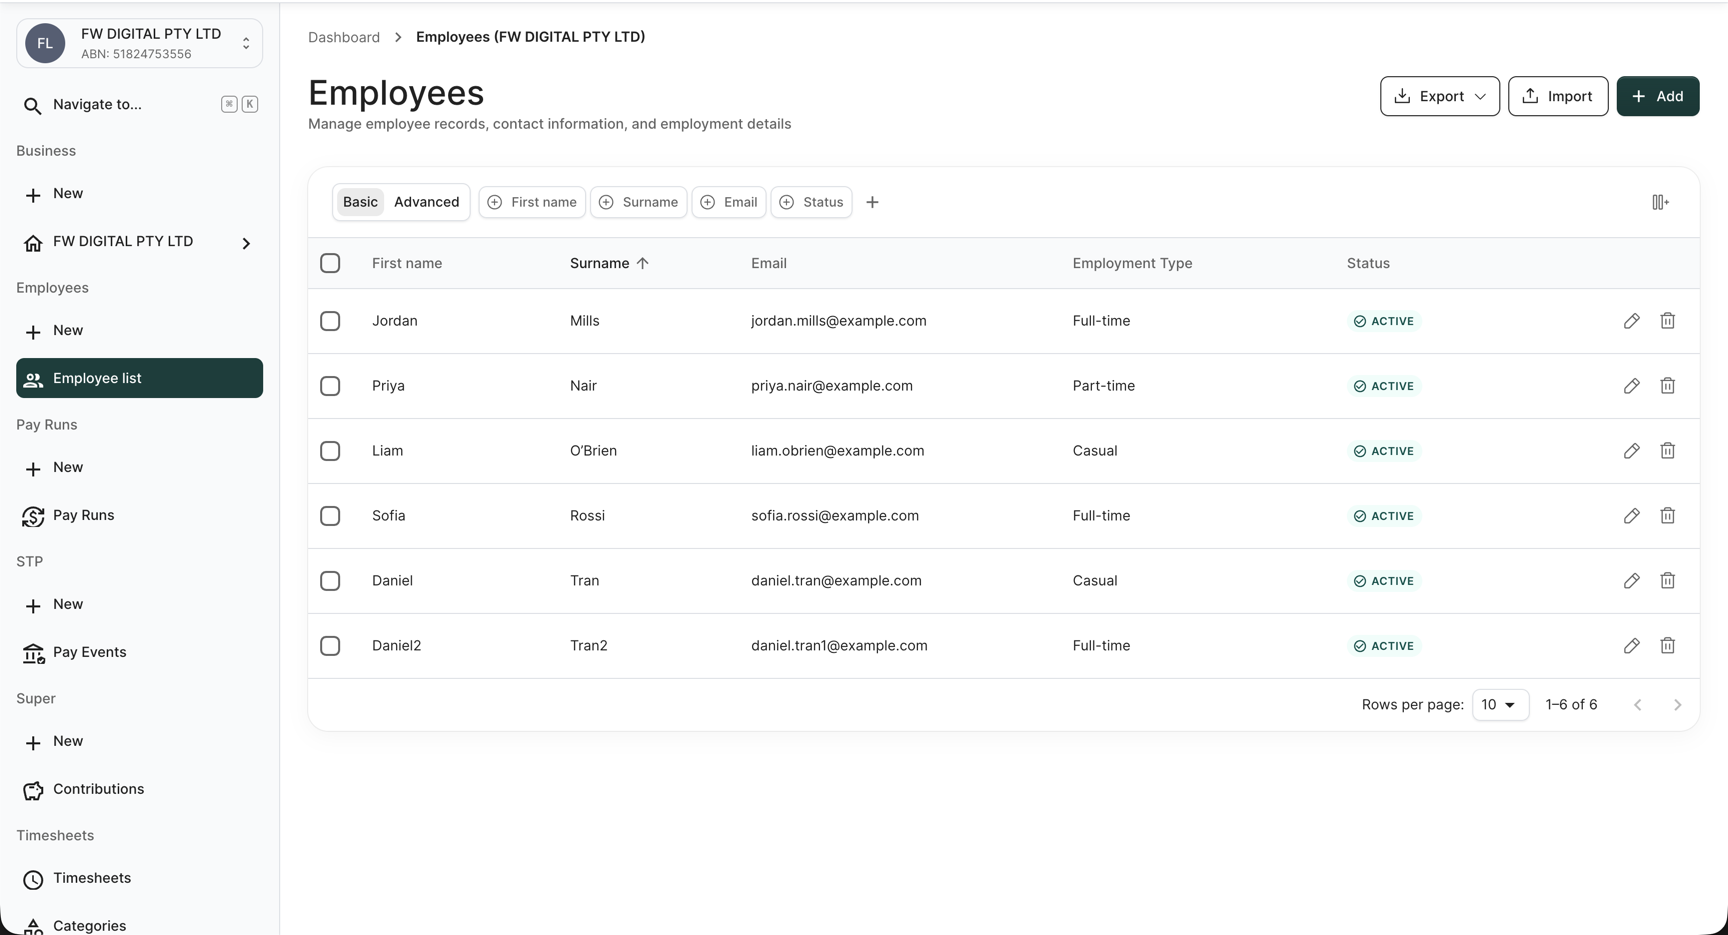
The Import employees dialog opens over the list. The list stays behind it, so closing the dialog returns you to exactly where you were.
The colour of the Import and Add buttons and the selected nav item come from your partner's branding and will differ from the screenshots here.
Step 3: Upload your file
Click Choose file and pick the file you prepared in Step 1. Paysense reads it in the browser and, once it has parsed, shows the file name under the button.
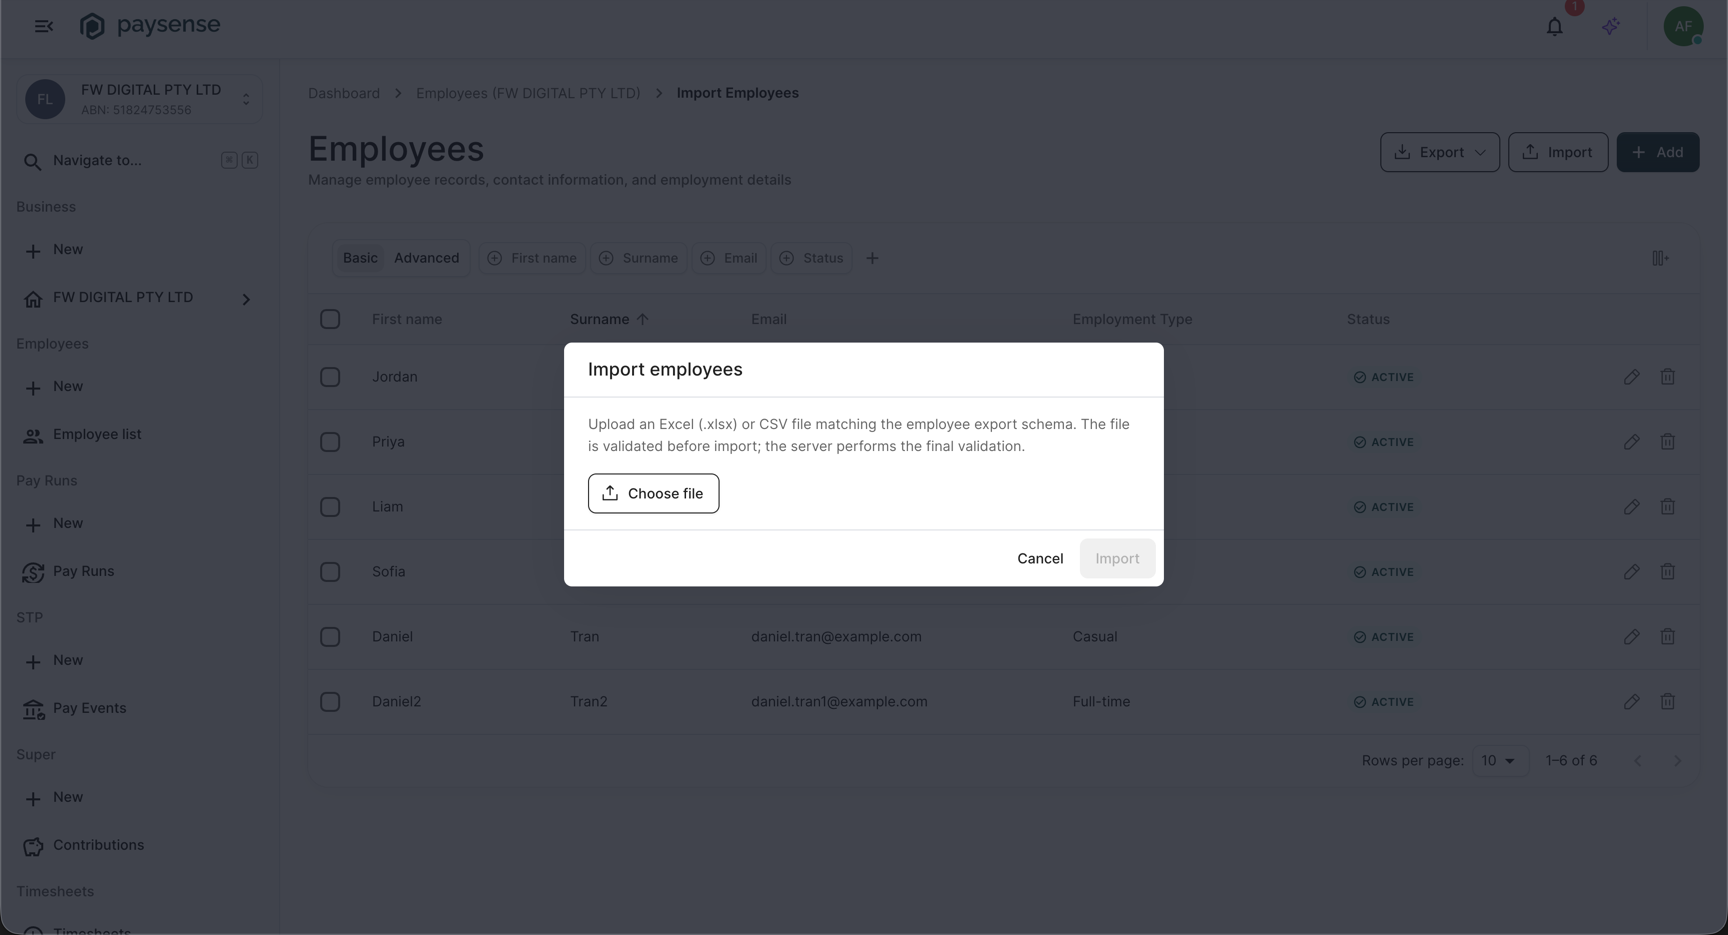
If the header row is missing a required column, or the file has no header row at all, the dialog shows a red error naming the problem instead of a summary, and you cannot continue until you fix the file.
Step 4: Review the summary and choose import options
Once the file parses, Paysense shows how many rows it found and how many passed the browser checks - for our file, six rows found, six valid and none with issues. When some rows have problems, the first few are listed underneath so you can find and fix them in the file.
Three options control how the import behaves:
| Field | Required | Notes |
|---|---|---|
| Overwrite existing employees | No | On by default. When on, employees matched by the file are updated with the file's values; when off, only new employees are created. |
| Import valid rows even if some fail (partial import) | No | On by default. When on, the valid rows are imported even if others have issues; when off, the Import button stays disabled until every row is valid. |
| Strict validation | No | Off by default. When on, the whole import fails on the first row the server rejects; when off, the server skips the rows it rejects and imports the rest. |
Leave the defaults to import every valid row and update anyone who already exists.
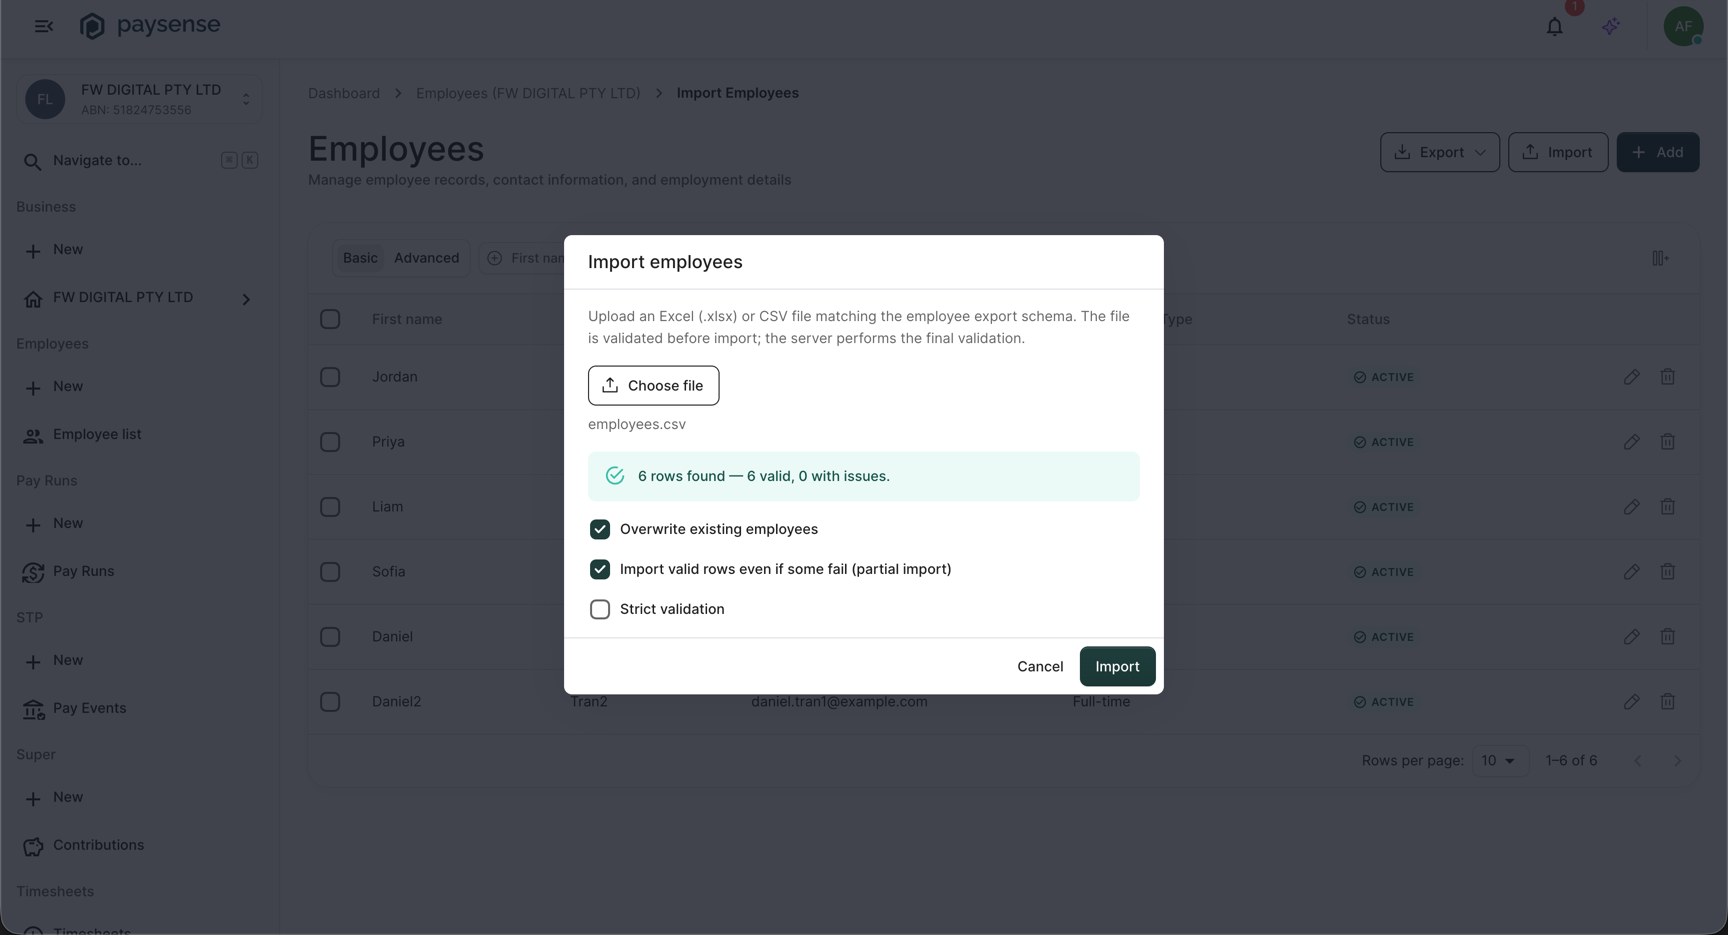
The Import button becomes available once a valid file is loaded. With partial import off, it stays disabled while any row still has an issue.
Step 5: Start the import
Click Import. Paysense hands the file to a background job, shows an "Employee import started." toast, and the dialog switches to a progress bar. The job runs on the server, so you can click Close and let it finish - the employees list keeps tracking the same job.
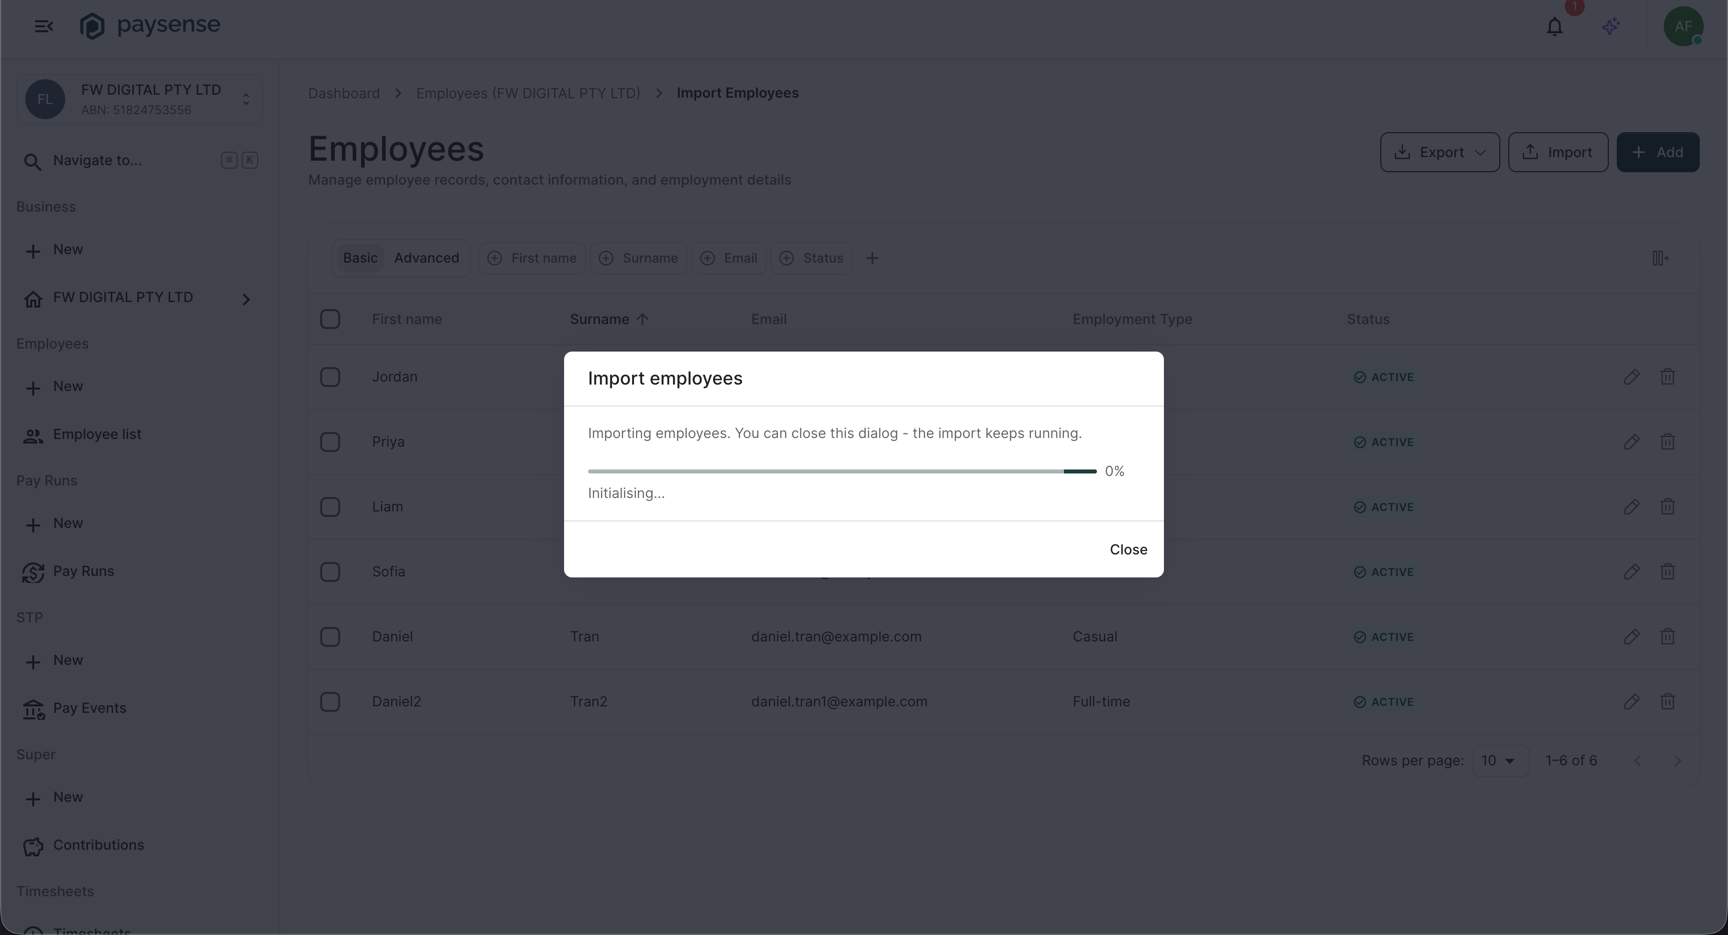
The server does the final, full validation as the job runs. A row that was valid in the browser can still be rejected here if it is missing details the browser doesn't check, such as a valid tax file number, a pay cycle, a pay rate, or bank account details.
Step 6: Confirmation
When the job finishes, the dialog reports the outcome. On success it reads "Import complete. Results are listed on the employee list."; if the server rejected the file it reads "Import failed. See the employee list for details." Either way, click Close to return to the employees list, where imported employees appear in the grid and any per-row problems are recorded.
What's next
Now that you can bring employees in from a file, the typical next steps are:
- Fill in what the import couldn't set - open any new employee and complete their bank accounts and super funds if the file didn't carry them.
- Add a one-off employee - for a single hire, the Add Employee wizard is quicker than preparing a file.
- Run your first pay run - once your team is in, see Run your first pay run.
Troubleshooting
| Symptom | Likely cause | What to do |
|---|---|---|
| No Import button on the employees list | Your account lacks the Employee.Write permission | Ask a team admin to grant it from Team → Members, or use an account that has it |
| Red error instead of a summary after choosing a file | The header row is missing a required column, or the file has no header row | Add the missing FirstName, Surname, Email, or StartDate column, keeping the export's header names, and re-choose the file |
| Summary shows rows "with issues" | One or more rows failed a browser check (blank required field, bad email, or a date not in yyyy-MM-dd) | Read the listed issues, fix those rows in the file, and choose the file again |
| Import button stays disabled | Partial import is off and at least one row still has an issue | Fix the flagged rows, or tick Import valid rows even if some fail to import the valid ones |
| Import finishes as failed | The server rejected rows for details the browser doesn't check, such as tax file number, pay cycle, pay rate, or bank details | Open the employees list for the recorded errors, complete those fields in the file, and import again |
If you hit a problem the table doesn't cover, check the Notifications panel on the business dashboard - it logs each import event with the underlying message.